This series of tutorials are for a 3D project, but the principles covered also apply to 2D games.
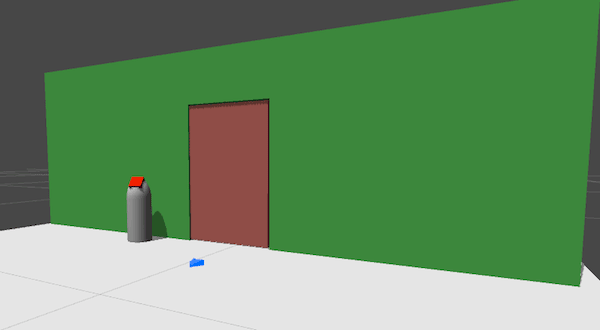
This simple scene was made out of standard Unity cubes and capsules, to represent a wall, a floor, and a button beside a door.
To prevent the Player from clicking "beyond" the walls and door, those objects have been placed on the Default layer, while the others are on the Ignore Raycast layer.
The scene has been set up with a default GameCamera, PlayerStart and NavMesh, so that the tutorial can focus just on Interactions. For more about setting up a basic 3D scene, see this tutorial.
We shall make the button on the pedestal clickable, and cause it to open the door, without the need for additional animation.
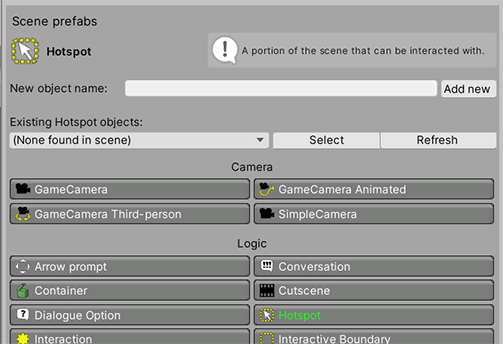
From the Scene Manager, click the Hotspot button to create a new Hotspot prefab.
The Hotspot should appear in the centre of the scene as a yellow cube. If it is not visible, make sure that the Hotspot script component is expanded in the Inspector view.
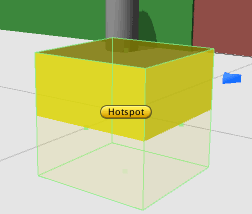
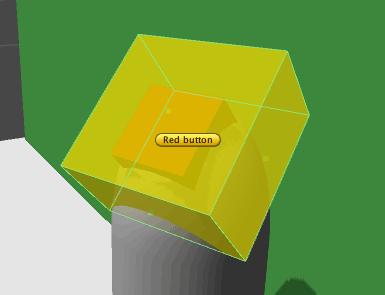
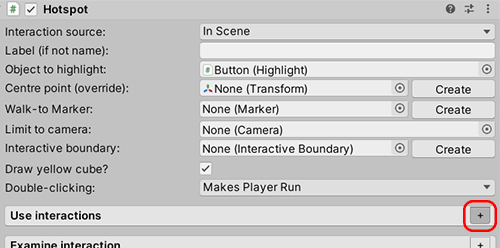
Position it over the button, and rename the Hotspot GameObject to Red button. The Hotspot's cube represents the region of space that the cursor must click over in order to activate it.
Though the Hotspot itself is not visible in-game, we can highlight any GameObject with a Mesh Renderer when we mouse-over it. For this Hotspot, we'll highlight the red button mesh. Find the Cube mesh that acts as the button, and add the Highlight script.
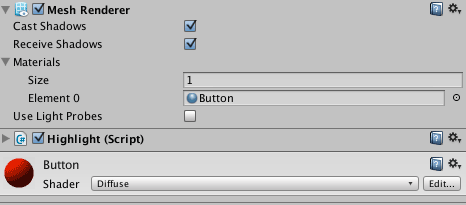
Back in the Red button Hotspot Inspector, assign this mesh object as the Object to highlight field.

This will cause the red cube to glow when we mouse over the Hotspot.

Back in the Hotspot Inspector, click Create beside the Walk-to Marker field to auto-create and assign a Marker that the Player can walk to before any interaction is run. Select the new Marker - a green arrow - and position it in front of the button.

Now we're ready to create an Interaction. An Interaction is a series of instructions that tell Adventure Creator what to do when we click on a Hotspot. For this simple example, we'll create a simple "Use" interaction.
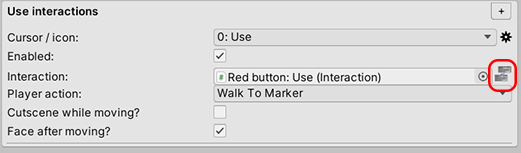
In the Hotspot Inspector, click on the "+" icon to the right of the Use interaction panel.
We want the Player to move towards the button before pressing it, so change the Player action field to Walk To Marker. Additional options will appear: check Face after moving as well. If we leave Cutscene while moving unchecked, we will be able to cancel the interaction by clicking away as the Player moves towards it.
The list of instructions, or Actions, is stored in a separate Interaction object. Click Create beside the field to make a new one, then click the node icon that appear to bring up the ActionList Editor window for it:
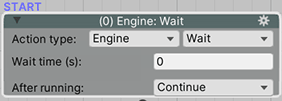
The new Interaction object will have been automatically named as Red button_Use for us. Click on it to see a single Action defined, in this case the Engine: Wait Action:
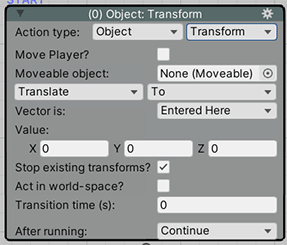
We want this list of Actions to cause the door to open. Though we could rely on animation to do the job, we also have the option of creating simple transforms with the Object: Transform Action. Change the Action's Action type to this.
This Action can only affect GameObjects with a Moveable script attached, so find the door mesh and attach the Moveable script to its list of components. Because the door will remain open during gameplay, we also need to give it the Remember Transform script component, so that it's position is recorded in save games.
Then, go back to the Action and assign the door object in the Moveable object field.

We can choose to Translate, Rotate or Scale the door, but let's make it slide open - leave Translate as it is, but change the To popup to By. This will let us move the door with relative co-ordinates.
The Vector field will vary depending on the orientation and scale of your scene, but in this example we'll be moving the door 1.5 units in the Z axis, and we'll set the Transition time to 1 second.
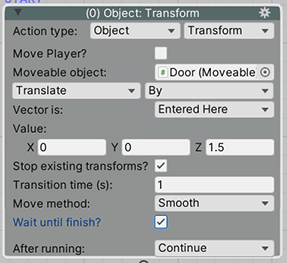
When a non-zero Transition time is set, additional options are shown. To add easing to our door's motion, change the Move method to Smooth, and check the Pause until finish box to prevent gameplay while it moves.
Our Player can now click on the button to open the door.
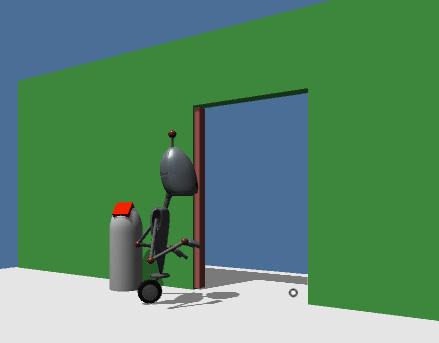
However, notice that we can continue to press the button once the door is open - causing it to move further away each time.
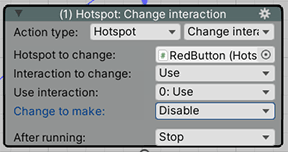
Let's disable the Use interaction after it runs, so that we can't call it again. Add a new Action by dragging out - and releasing - a wire from the bottom of the Action. Change it's type to Hotspot: Change interaction
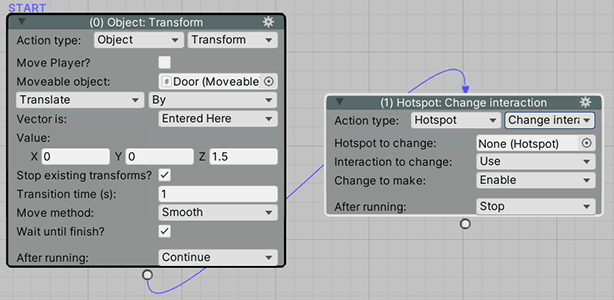
Set the Hotspot to change as the Red button Hotspot, leave the Interaction to change as Use, and set the Change to make as Disable.
This will prevent the door from being "opened" multiple times.
Finally, because the state of the Hotspot can now change, attach the Remember Hotspot component to it, so that the state of the Use interaction is recorded in save games.