In the last tutorial, we created a Quick Time Event that had the player button-mashing his way to a friendly message - else the game quits. This time, we'll improve the look of the prompt that appears on-screen - giving some nice animation and visual feedback.
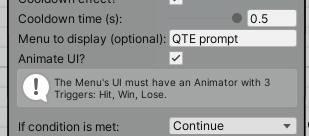
Return to the Input: QTE Action we created, and check Animate UI?. An info box will appear, describing the Animation Controller that our UI Canvas must have:
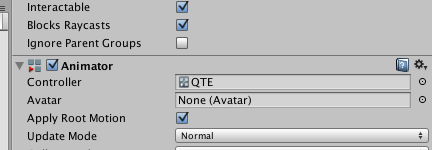
Now return to the QTE_Canvas prefab, and attach an Animator component to it. Create and assign a new Animation Controller asset for it:
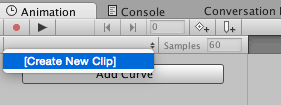
Let's create a "hit" animation that plays whenever the player presses the "Down" button. Drag an instance of the QTE_Canvas prefab into your scene, open the Animation window, and create a new clip called Hit.
Create a brief animation that informs the player that they've pressed the correct button. Quickly shrinking the Image, then returning it to it's original state, will do just fine. Tutorials on working with animation in Unity can be found here.
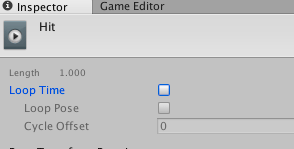
Once finished, select the Hit animation asset, and uncheck Loop time.
If we wish to also make Win and Lose states, we can do so in the same way.
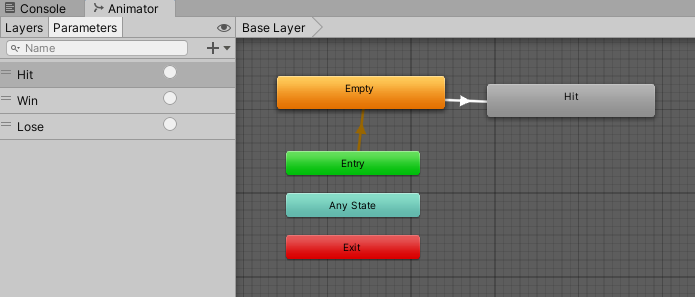
Apply the changes to the QTE_Canvas prefab, and remove the local instance from the scene. Now open the QTE_Canvas's Animator window, and create Trigger parameters named Hit, Win and Lose. Right click inside the main clip window to add a new Empty state called Default, and set it as the default, so that none of the others play until they're supposed to.
Then create a transition from the default state to Hit, which uses the Hit Trigger as its Condition.
Now re-run the scene and test the QTE. Our new Hit animation should play every time we press the correct button.
However, we still have no way of knowing how long we have left to perform the QTE - so let's fix that now. Place the QTE_Canvas prefab back in the scene, and add a UI Slider GameObject as a child. This slider will act as the "time remaining" bar, so restyle it to something like this:
We now need to link this slider to the Menu Manager, so that Adventure Creator can affect it in-game. Back in the Menu Manager, select the QTE prompt Menu and add a Timer element.
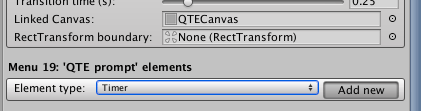
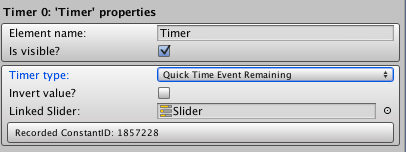
Set the Timer type to Quick Time Event Remaining, and drag our UI Slider into the Slider field.
Re-apply the changes made to the QTE_Canvas prefab, and remove it from the scene once more. Re-run the scene, and you'll find that the slider now represents how long the player has left to perform the QTE.
Be aware that - through custom scripting - we can affect any UI element to represent the time remaining. For example, we could use an Image's "fill amount" value instead. To get the time remaining as a decimal between 0 and 1, we can use this simple function:
AC.KickStarter.playerQTE.GetRemainingTimeFactor ();