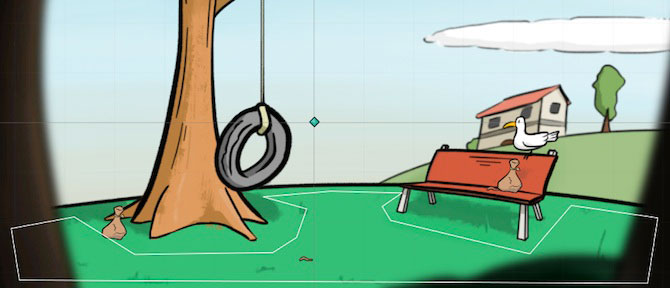
A NavMesh is required for characters to be able to pathfind, or move dynamically around a scene. In 2D, this is handled with a Polygon Collider, whose shape is used to describe the area that characters can walk in. The shape of that used for the 2D Demo looks like this:
After setting up a 2D scene, find the Scene settings panel of the Scene Manager. Keep the Pathfinding method set as Polygon Collider, and click Create beside the Default NavMesh field to auto-create and assign a new NavMesh:

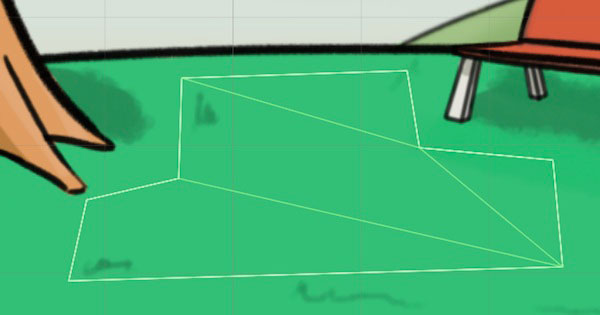
This will appear as a white pentagon in the middle of the scene:
In the Scene window, manipulate the Polygon Collider's vertices to outline the shape of your desired NavMesh. Keyboard commands depending on your platform are available here. You can create more vertices if you wish, but it's good practice to only use the minimum needed.
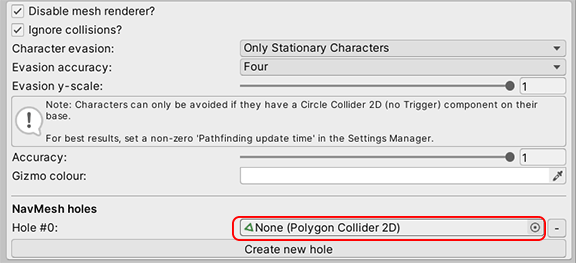
If you want to have holes in the NavMesh, that characters must walk around, you need to add them as separate shapes. Create a new GameObject, add a Polygon Collider 2D component, and re-shape it over the intended hole. Then, in the Default NavMesh's Inspector, assign it under the NavMesh holes section at the bottom:
Once configured, all characters will then make use of the NavMesh as they navigate the scene. However, they won't yet scale or change their sprite ordering as they do so - we'll work on that next.