By default, the volume of SFX, Music and Speech audio is set by the Audio Source component of whatever is playing that sound - though this is automatically synced with the various volume levels set in the Options menu.
However, it is possible to have such volumes rely on Unity's Audio Mixers feature, which allows for the introduction of special audio effects like reverb and filtering.
This can be enabled in the Settings Manager. Under the Audio settings panel, set the Volume controlled by field to Audio Mixer Groups. Doing so will reveal a few more settings specific to this option:
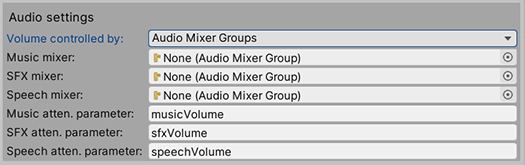
For each of the three sound types, we now need to supply an Audio Mixer Group, as well as an attenuation (volume) parameter that AC can control.
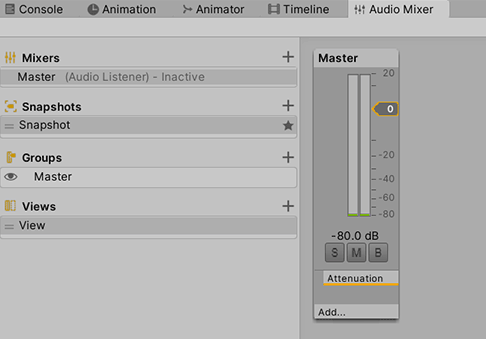
We'll have all three groups derive from the same mixer. In the Project window, right-click and choose Create → Audio Mixer, and name the new asset Master. Double-click it to bring up the Audio Mixer window:
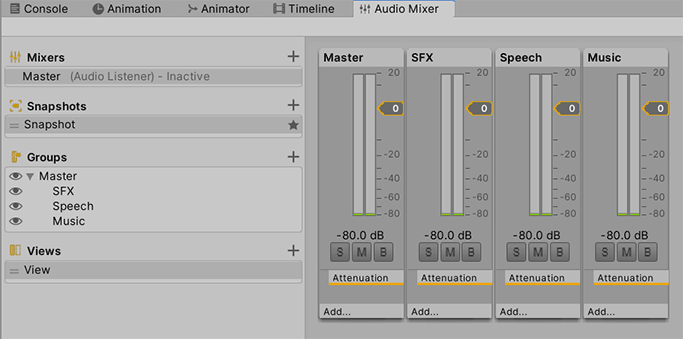
Under Groups, create three new Mixer Groups named SFX, Speech and Music. Arrange them so that they are all direct children of Master:
Select the SFX group and view its Inspector. Right-click the Volume label and choose to expose it as a parameter:
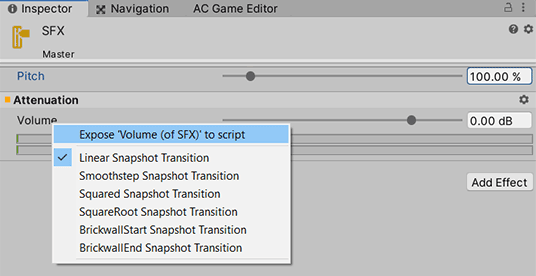
Do the same for the Music and Speech groups, and you should now have three exposed parameters listed at the top-right of the Audio Mixer window:

The labels to the left can be renamed by double-clicking them, so rename them to something more readable, e.g.:

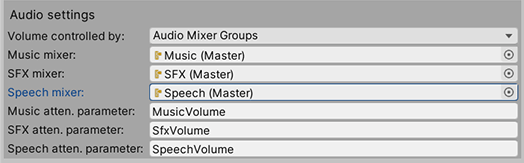
We now have all that we need for the Settings Manager. Back in the Audio settings panel, we can now assign the Audio Mixer Group - and the name of its attenuation parameter - for Music, SFX and Speech:
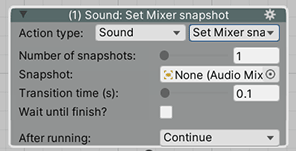
AC will now rely on these groups for audio playback, taking advantage of any snapshots we wish to apply. Snapshots can have special audio effects applied, and can be created in the Audio Mixer window. Check Unity's own docs for more on this, but we can blend snapshots in AC ActionLists with the Sound: Set Mixer snapshot Action: