Items can be added to, and removed from, the player's Inventory using the Inventory: Add or remove Action. When removing an item this way, though, it simply gets deleted.
This tutorial covers how an item can instead be moved from the Inventory into the scene as a physical object, ready to be picked up again later.
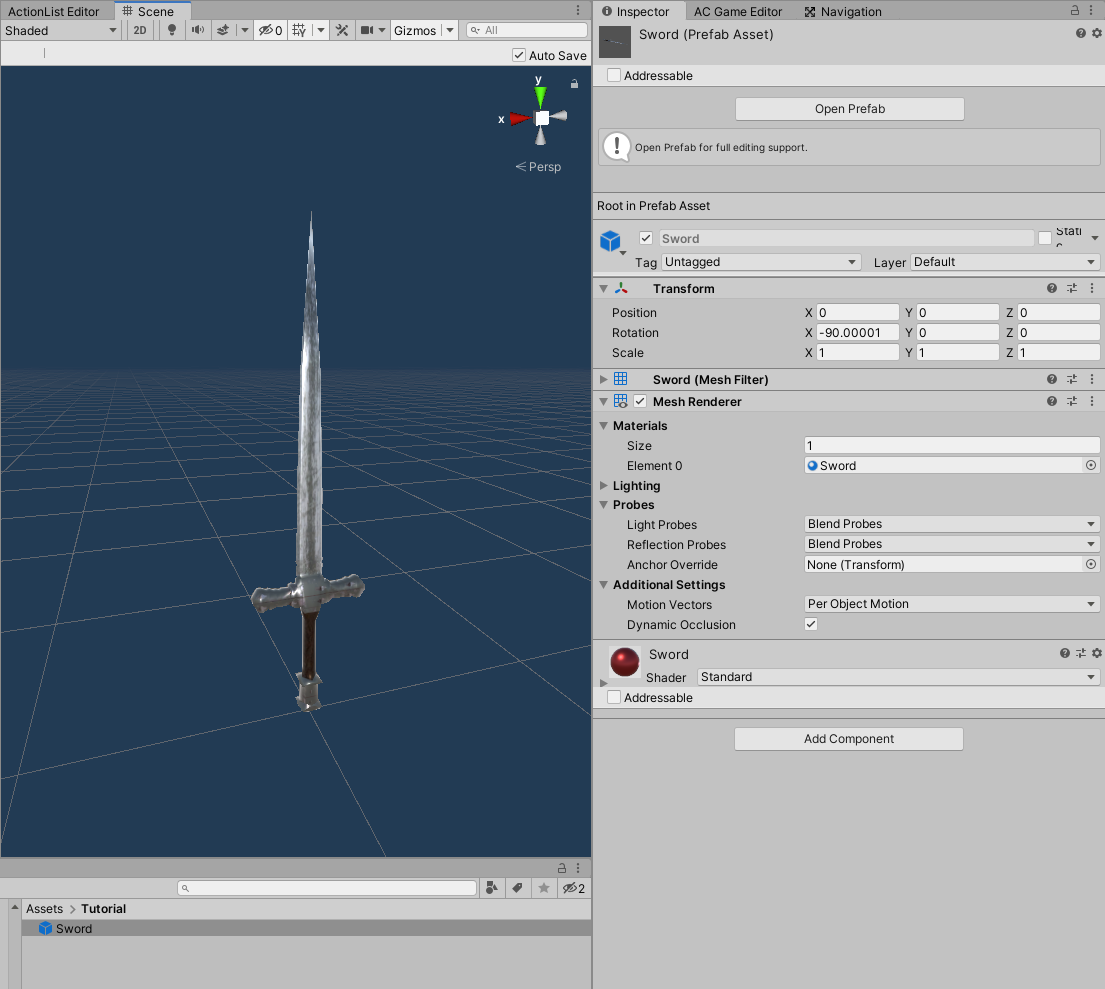
As an example, we'll be using the "sword" item graphics from the 3D Demo - but you can apply the technique to your own assets.
To start with, we'll make sure we have an item defined in the Inventory Manager's Items tab, with a Name and Main graphic defined:

For the 3D Demo's Sword, a 3D model can be found in Assets -> AdventureCreator -> Demo -> Models -> Props -> Sword. Select the model and drop it into the scene. Then make it a prefab - by dragging it from the Hierarhcy window into the Project window - then remove from the scene:
Return to the Inventory Manager, and drag this prefab file into the item's Linked prefab field. This prefab will now be used to represent the item when placed in the scene.
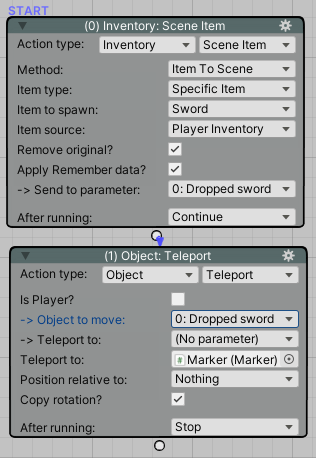
To place this prefab in the scene at runtime, we can use the Inventory: Scene item Action. Add this Action to a new ActionList or Cutscene, set the Method to Item To Scene, Item type to Specific Item, and Item to spawn to Sword:
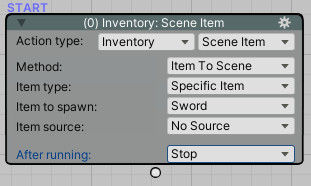
If we were to run this Action, it would cause a copy of our Sword prefab to be spawned in the scene - but it won't be the one from the Inventory, just a copy. To have it instead move the actual Sword that's in our Inventory, set the Item source to Player Inventory, and check Remove original?:

Running the Action now will cause the Sword item that's in our Inventory to be removed at the same time the the prefab is spawned in the scene.
We'll likely want to drop this item in a specific place in our scene, however. To do this, we'll start by using the Scene Manager to add a Marker as a reference point.
To have the spawned Sword appear at this Marker, we'll use the Object: Teleport Action. Add this Action to the ActionList, have it reference the new Marker, and check Copy rotation:
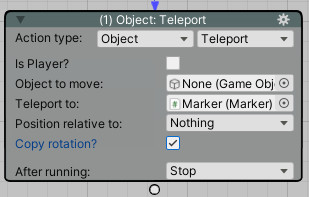
Note that the Object to move field here is blank. While we could assign the Sword prefab here directly, it'll only work if we have a single instance of the prefab in the scene. If we want to be able to carry and drop multiple copies of this item, we'll need to affect the specific prefab we've just spawned.
To do this, we'll make use of parameters, In the ActionList's Properties panel, define a new GameObject parameter named Dropped sword:
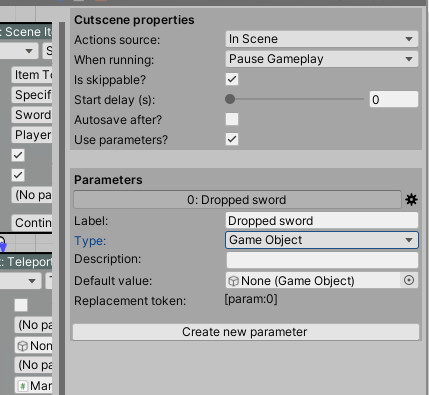
Close the Properties panel again, and notice how the Inventory: Scene item Action has been updated with the ability to set this parameter in its Send to parameter field. Assign it here, and also use it to override the Object: Teleport Action's Object to move field:
This will now make sure that the object being teleported is the same that was spawned.
To have the Sword drop to the ground when dropped, select the prefab and attach a Rigidbody component, as well as Box Collider (or Mesh Collider) if it doesn't already have one.
Finally, we'll need to update this prefab with some components that will allow its presence in the scene to be saved - so that it will still be on the ground if the player leaves the scene and returns.
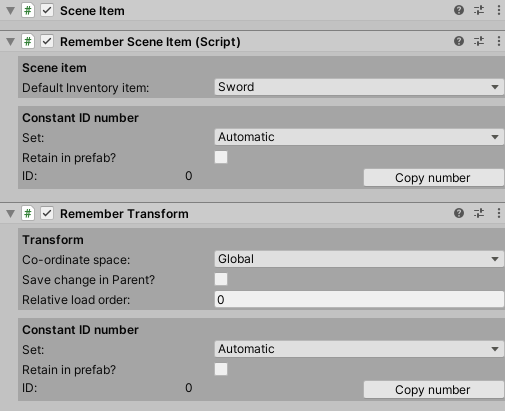
First, attach the Scene Item component. This has no Inspector, but is necessary for the next component: Remember Scene Item.
In the Remember Scene Item component's Inspector, set the Default inventory item field to match the item it represents: in this case, Sword.
Finally, attach the Remember Transform component. This will record the object's position and rotation.
And that's it for dropping the item. If the Sword has Can carry multiple? checked, we can hold and drop as many instances of the item as we like - and each will be recorded separately in the scene.
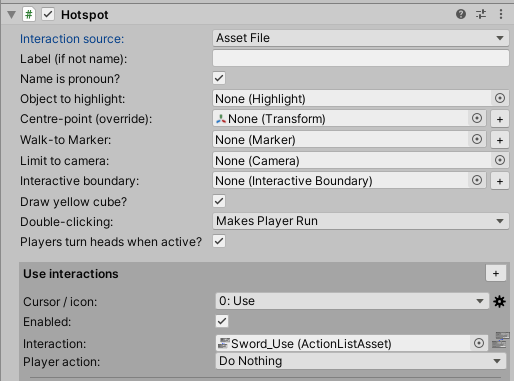
Next, we'll make it so that the sword can be picked up again. To do this, we'll make the Sword prefab interactive by adding a a Hotspot component to it.
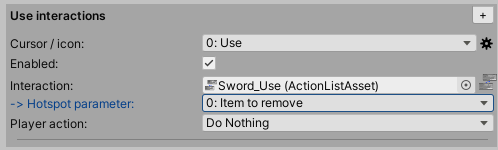
As this prefab is scene-independent, we'll need to use ActionList assets for its logic. Set the Interaction source field to Asset File, and create a new "Use" Interaction and ActionList:
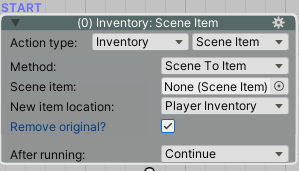
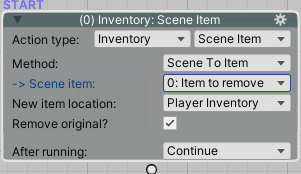
The ActionList asset need only consist of a single Inventory: Scene item Action, which can both remove the object from the scene, and place it in the Inventory. We can do this by setting its Method to Scene To Item, the New item location to Player Inventory, and checking Remove original?.
Once again, we could assign the Sword prefab in the Action's Scene Item field. However, because this link relies on the prefab's unique Constant ID value, this would only work if we only had one copy of the sword in the scene.
Instead, we'll again make use of parameters. In the ActionLists's Properties panel, define a new GameObject parameter named "Item to remove", and use it to override the Scene Item field:
The last step is just to make sure that this parameter is assigned to the instance of the Sword prefab in the scene. We can do this by going back to our Hotspot Inspector - which has since updated itself to reflect recent changes - and set the Use interaction's Hotspot parameter to Item to remove:
If we wanted more control over parameter value assignment here, we could instead attach the Set Interaction Parameters component.
With this interaction set up, we can now pick the sword up again once it's been dropped into the scene!