Saving the states of scene objects in Adventure Creator is a simply matter of attaching the correct "Remember" script to it. Adventure Creator provides several such scripts - each of which save a different type of scene data. For example, attaching the RememberHotspot script to any Hotspot will save that Hotspot’s on/off state, as well as the state of each Interaction within.
In more complex games, however, it may be necessary to save more data than the standard Remember scripts allow. Fortunately, it’s possible to write custom scripts that can be attached to scene objects to save whatever you want.
This will be a fairly complex tutorial, and a good knowledge of scripting practices is expected. In it, we’ll write a new Remember script that saves the on/off state of any Light component it’s attached to.
Create a new C# script called RememberLight. Use the AC namespace, and derive the class from Remember. It should also require the Light component:
using UnityEngine;
using System.Collections;

namespace AC
{

	[RequireComponent (typeof (Light))]
	public class RememberLight : Remember
	{

	}

}
This is a MonoBehaviour script, which means it can be attached to GameObjects. However, we must store the data itself in a separate class. Beneath the RememberLight class, create a new class called LightData, derive it from RememberData, and give it the System.Serializable attribute:
using UnityEngine;
using System.Collections;

namespace AC
{

	[RequireComponent (typeof (Light))]
	public class RememberLight : Remember
	{

	}

	[System.Serializable]
	public class LightData : RememberData
	{

	}

}
The LightData class only needs one variable - a boolean called isOn, that is controlled by the attached Light component’s enabled state. Also give it a default constructor:
[System.Serializable]
public class LightData : RememberData
{
	public bool isOn;
	public LightData () {}
}
We now just need to add two override functions to our RememberLight class. The first of these is SaveData, which returns a string:
[RequireComponent (typeof (Light))]
public class RememberLight : Remember
{

	public override string SaveData ()
	{
	}

}
This function will create a new instance of LightData, based on the attached Light component:
public override string SaveData ()
{
	LightData lightData = new LightData ();
	lightData.isOn = GetComponent <Light>().enabled;
}
The RememberData, which LightData derives from, has an integer variable called objectID. This must be set to the value of constantID, an integer variable in Remember, which RememberLight derives from:
public override string SaveData ()
{
	LightData lightData = new LightData ();
	lightData.isOn = GetComponent <Light>().enabled;
	lightData.objectID = constantID;
}
This data can be converted automatically into a serialized string with the Serializer.SaveScriptData function. The class name of the data (in this case, LightData), must be used in the function call:
public override string SaveData ()
{
	LightData lightData = new LightData ();
	lightData.isOn = GetComponent <Light>().enabled;
	lightData.objectID = constantID;

	return Serializer.SaveScriptData <LightData> (lightData);
}
The second override function we must add is LoadData, which requires a string:
public override void LoadData (string stringData)
{}
This function will de-serialize the string using the Serializer.LoadScriptData function, and set the state of the Light component accordingly. Note: To safeguard issues that may arise if multiple "Remember" scripts are placed on the same GameObject, we must also check that the loaded data exists:
public override void LoadData (string stringData)
{
	LightData data = Serializer.LoadScriptData <LightData> (stringData);
	if (data == null) return;
	GetComponent <Light>().enabled = data.isOn;
}
And the finished script:
using UnityEngine;
using System.Collections;

namespace AC
{

	[RequireComponent (typeof (Light))]
	public class RememberLight : Remember
	{

		public override string SaveData ()
		{
			LightData lightData = new LightData ();
			lightData.isOn = GetComponent <Light>().enabled;
			lightData.objectID = constantID;

			return Serializer.SaveScriptData <LightData> (lightData);
		}


		public override void LoadData (string stringData)
		{
			LightData data = Serializer.LoadScriptData <LightData> (stringData);
			if (data == null) return;
			GetComponent <Light>().enabled = data.isOn;
		}

	}

	[System.Serializable]
	public class LightData : RememberData
	{
		public bool isOn;
		public LightData () {}
	}

}
The RememberLight script can now be added to any Light source in our scene, and it will save and restore it’s on/off state automatically. A Light source’s on/off state can be changed in-game by attaching the LightSwitch script to it, and sending the messages TurnOn and TurnOff to it with the Object: Send message Action.
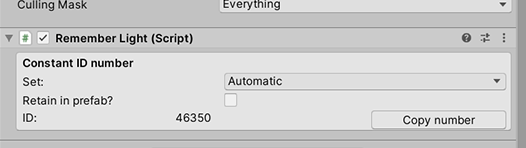
The component will automatically provide the UI to manage the Constant ID number assigned to the GameObject it's attached to. Note, however, that you will need to write a custom inspector if you want to add additional fields or controls to it. This is because there is already an Editor included for the base class, ConstantID. A custom Editor can therefore be written by deriving one from ConstantIDEditor.
The following is an example editor script for the RememberLight component, allowing additional fields to be inserted:
using UnityEditor;

namespace AC
{

	[CustomEditor (typeof (RememberLight), true)]
	public class RememberLightEditor : ConstantIDEditor
	{

		public override void OnInspectorGUI ()
		{
			RememberLight _target = (RememberLight) target;
			// Custom fields here
			SharedGUI ();
		}

	}

}